Dynamically analyzing a heavily obfuscated Excel 4 macro malicious file
Recently I had to analyze an Excel malicious file that was caught in the wild, in a real attack. The file was used in a spear phishing attack where a victim was enticed into opening the file with Excel and, of course, enabling macros.
The image below shows what the file looks like when opened in Excel:
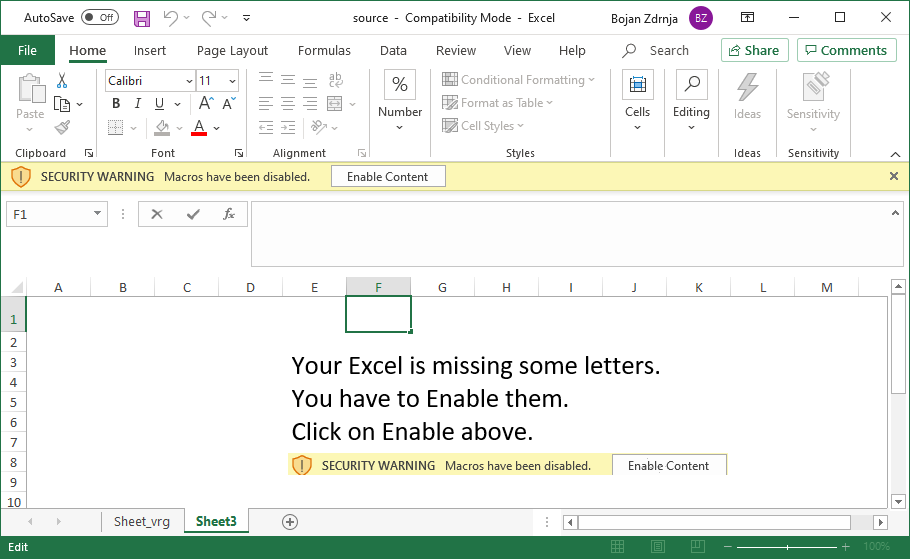
As you can see, it is a very common malicious Excel file where the victim is supposed to click on the Enable content button to see the document. Of course, once the victim does that it is game over and the machine gets infected. My goal was to analyze the malicious Excel file to identify what exactly it is doing.
Typically, the first step to analyze such a document would be verify macros with Didier’s oledump.py tool, which is the de-facto standard malicious document analysis tool (the FOR610 instructors are joking that Day 3 of FOR610 is Didier’s day, since he wrote so many useful tools).
However, as you can see below, I was a bit disappointed to see that there are no macros – this normally means that the attacker is using Excel 4 macros – an old way of creating active content:
$ python3 oledump.py ~/source.xls
1: 4096 '\x05DocumentSummaryInformation'
2: 4096 '\x05SummaryInformation'
3: 162264 'Workbook'
Both Didier and Xavier wrote a number of diaries about analyzing Excel 4 macros (available here and here), so the next step was to use the BIFF plugin Didier wrote, which allows output of BIFF records – these hold Excel 4 macros (formulas really), so let’s do that:
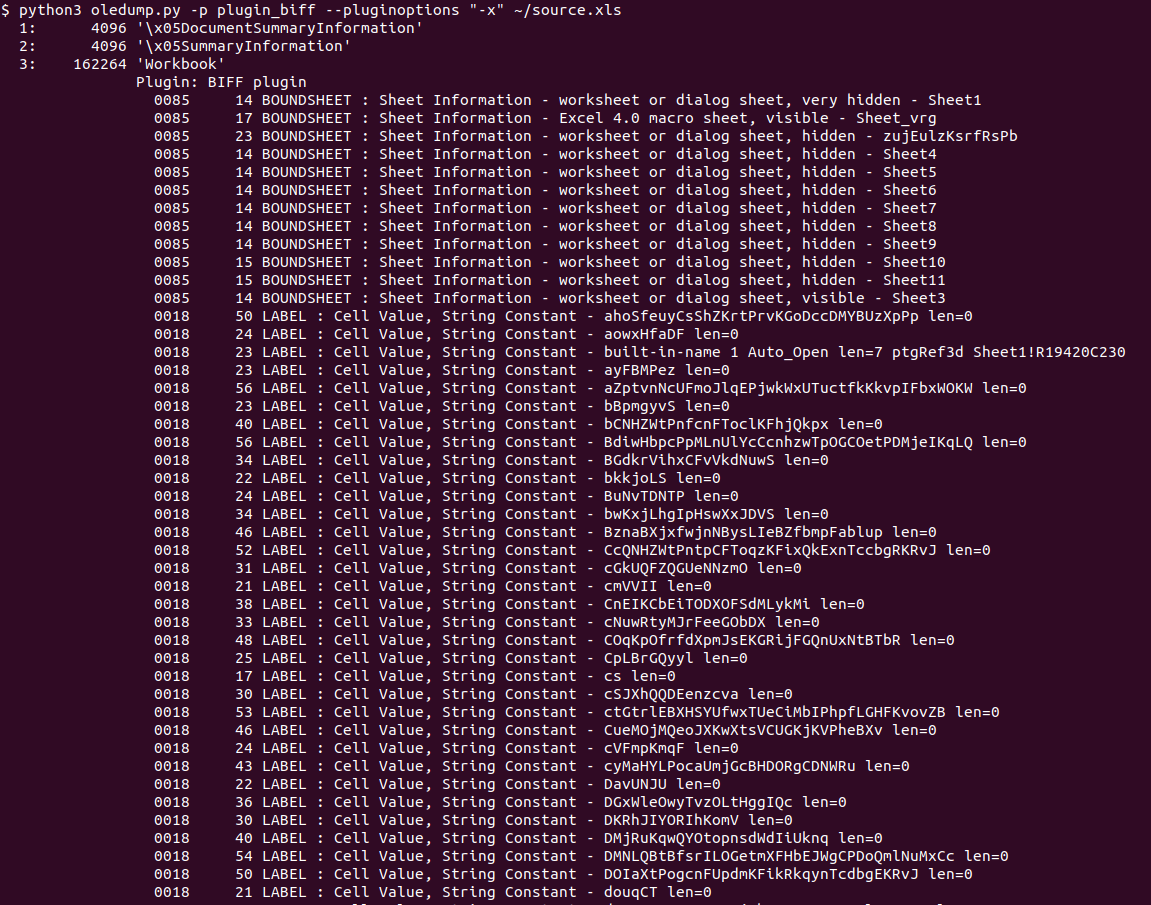 Ok, we’re getting somewhere, however there were thousands of lines like this in the output:
 Not nice. This means that Didier’s BIFF plugin does not know how to parse these bytes, which define a currently unknown formula. Didier also wrote about another tool that can be used to deobfuscate malicious Excel files, XLMMacroDeobfuscator (read the diary here) so I thought about trying that as well:
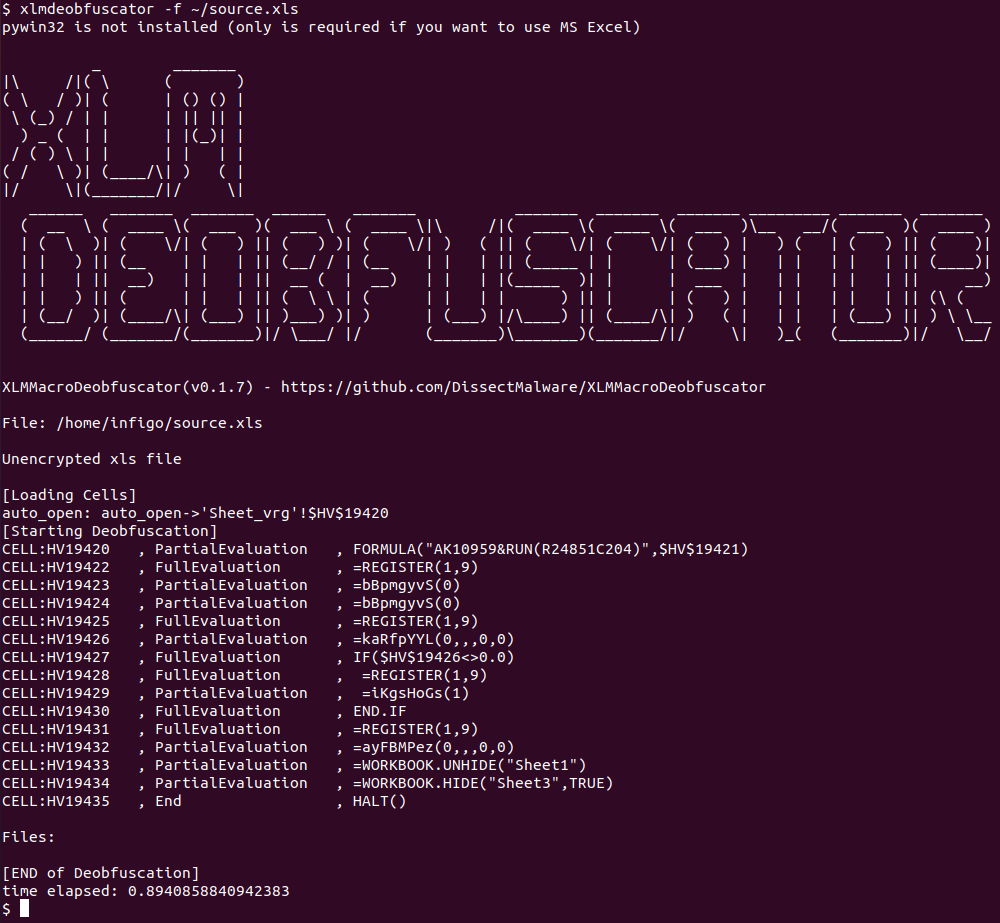 Hmm, a bit better but we still do not know what exactly this file is doing. There are two important things we can see in XLMMacroDeobfuscator’s output though:
- First, we can see that there is a cell with the name of Auto_Open. The contents of this cell will be executed (if it is a formula) automatically when this Excel file is open, after the user has clicked on the Enable content button, of course.
- Second, we can see that the last two functions that are called are WORKBOOK.UNHIDE and WORKBOOK.HIDE. These do exactly as their names say – they will hide one workbook and unhide another – this will result in the final, decoy content to be shown to the victim (no screenshot, sorry, as it contains sensitive information about the target).
Armed with this knowledge I wanted to dig further into the file. While most researchers might prefer static analysis since it is safer, in this case such analysis might be very difficult or time consuming. The main reason is that the tools we have on our disposal failed to completely parse the document (as shown above) and, besides this, the file is heavily obfuscated with a number of formulas and calculations that are performed automatically by Excel.
So, I decided to go with dynamic analysis of the file – cool thing is that, at least for this case, we do not need any other tools but Excel. Of course, by running malicious code we will be putting ourselves to risk, so if you ever need to perform a similar analysis, make sure that you do it in a VM, without Internet access (or you will be really living on the edge).
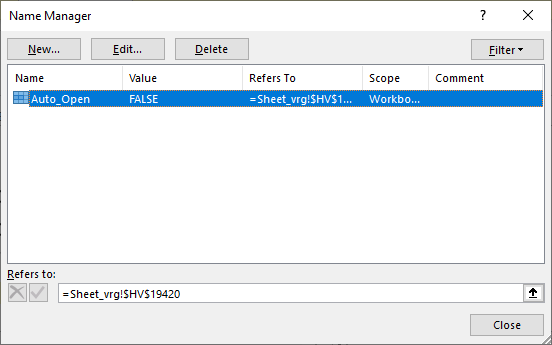
Since this malicious document does not have a VBA macro, it relies on executing formulas. Excel will generally execute formulas top to bottom in a column, then move to the next column and so on. This does not necessarily has to be in this order, but in all cases I have checked it was. Our first step will be to find the cell (formula) that gets executed first – XLMMacroDeobfuscator already told us that it is a cell in the “Sheet_vrg” tab of this document, and that the cell is $HV$19420 (column HV, row 19420). We can also see this by opening the malicious file in Excel (notice I am not enabling content yet!) and then going to Formulas -> Name Manager. We will see this very same cell displayed, as shown in the figure below:
Let’s scroll now to this cell to see what its contents look like:
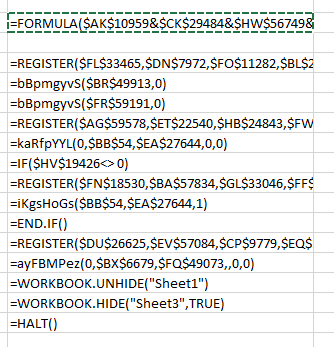
Aha – this is actually what XLMMacroDeobfuscator showed to us, but it partially evaluated the contents so we still do not know what this code actually does. So let’s see how we can dynamically analyze this document. Excel actually allows us to manually evaluate any formula shown in the document. All we have to do is right click on a cell, but the catch-22 here is that we have to click on Enable content in order to do that, and by doing this we will execute the malicious macro.
The solution is, luckily, relatively simple. A function called HALT() exists that does exactly what the name says, so we can manually insert this function in a free cell and then change the Auto_Open name to point to our cell. What’s even better – in the image above you can see that there is already a cell with the =HALT() function (it’s the last one), so let’s just change Auto_Open to that cell:
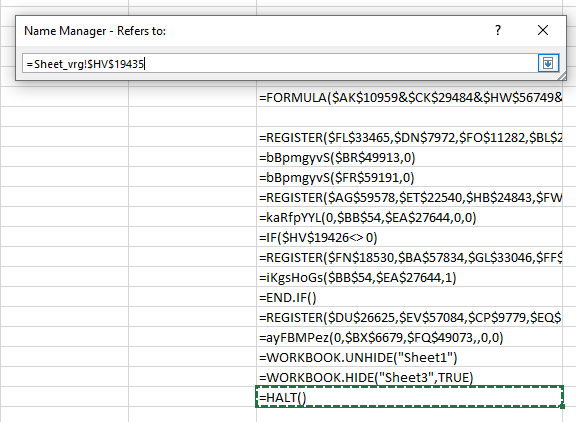
Now we can safely click on the Enable content button and nothing will happen! We will stop at the =HALT() function but we can now inspect other cells and contents around this file.
Since the document is heavily obfuscated, we will want to somehow debug it – single step through it. In this particular case, this was not all that difficult, but keep in mind that with a very complex and obfuscated document, the following activities might be more difficult to perform (but still easier than performing static analysis).
What we will want to do here is (ab)use the =HALT() function to execute a formula in a single cell and then stop the execution. This will allow us to examine what happened, evaluate the formula and continue. In the example below, you can see that I copied contents of all cells under the first one (the original Auto_Open cell) and put =HALT() in the cell immediately after the first one. This will cause Excel to stop processing formulas:
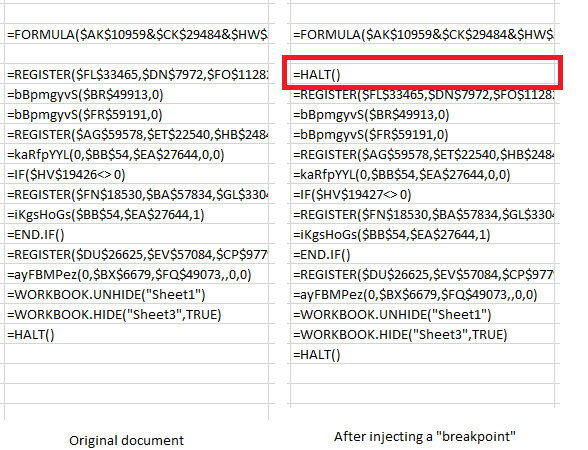
We can now use Excel’s built-in evaluation. In order to do that we will right click on the first cell, select Run and then Step Into. This is what we will get:
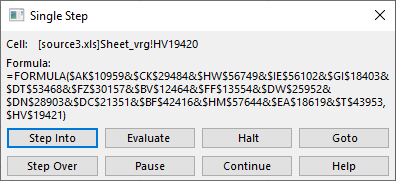
Pretty cool! Notice that nice “Evaluate” button? Let’s see what it does:
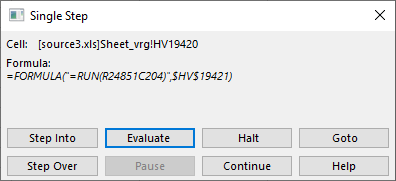
So this is what the first cell does! Depending on how complex this is, we might need to click on “Step Into”, which will take us further down the rabbit hole (Hi Neo!) and we will start evaluating whatever is under this particular function. Since I was impatient I clicked on “Continue” – remember that I put our “breakpoint” with the =HALT() function and this will be kind of similar to pressing F9 in your debugger.
In this document there was a bunch of functions called by the top one – most of them actually deobfuscated various content which is now populated in “new” cells in this worksheet. Keep this in mind – a nasty document could actually change contents of our =HALT() cell, which would lead to the payload fully executing.
Since it was not the case here, we continue by shifting the =HALT() breakpoint to the next row, like this:
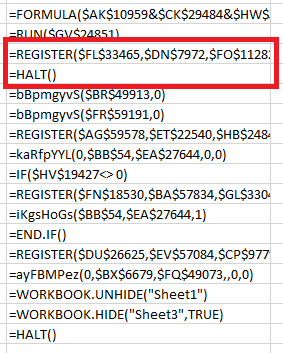
You can probably guess what we’ll do next – right click on the =REGISTER() cell, click on Run then Step Into, and this is what we get:
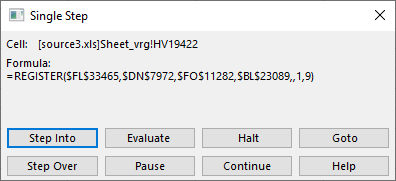
Let’s Evaluate this again – it should work because the cell that got executed before populated what this (currently executing) cell needs:
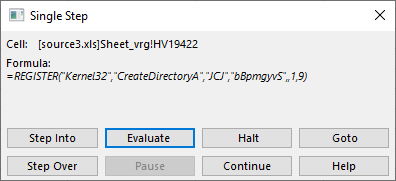
Interesting! The REGISTER() function allows us to create a defined name which will point to a function in an external DLL. Sounds fantastic for the attacker – what they are doing here is create a name called “bBpmgyvS” which will point to the CreateDirectoryA function in the Kernel32.dll library. It is quite clear that the attacker will want to create a directory on the local machine.
And now it is rinse and repeat – we use the same method to evaluate all other cells until we figure out what the document is doing. The one I was analyzing uses the same mechanism to create another name that points to URLDownloadToFileA from the URLMON.dll library, which is used to download the second stage binary.
The same mechanism is again used to create a name that points to ShellExecuteA function from the Shell32.dll library which executes the downloaded binary.
At the end, the attacker hides this sheet and shows a decoy one.
And this leads us to the end of this diary/tutorial. I hope you found it interesting and useful, and that it will help someone analyze such heavily obfuscated Excel 4 macro malicious files which, this time with help of Microsoft’s own Excel can be relatively easily dynamically analyzed.
Finally, I have to stress out one more time that you should be ultra careful when performing such an analysis since we will be executing malicious code.
| Web App Penetration Testing and Ethical Hacking | London | Mar 2nd - Mar 7th 2026 |


Comments
Enjoy!
John
Anonymous
Jan 14th 2021
5 years ago
Anonymous
Jan 14th 2021
5 years ago