Statically Unpacking a Brazilian Banker Malware
After going through an almost endless amount of encoded droppers and loader scripts while analyzing a Brazilian banker, I finally managed to reach the actual payload, an interestingly packed/encrypted banking malware. How I statically unpacked this payload is the subject of today’s diary and I hope it will help you in your future analysis.
The Sample
One of the first things we do when we get a new sample is using a tool to identify important characteristics of the file, like the file type (whether it’s a PE or ELF file), the compiler, if it is packed and, luckily, the packer used. Packing is a very common way used by adversaries to compress the malware and make it harder to reverse engineer.
Let’s take a look at our sample using the Die (Detect it Easy) tool.
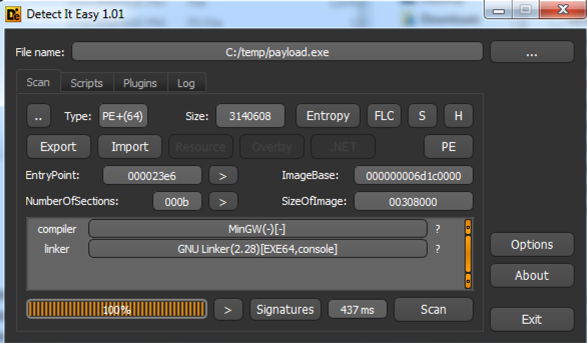
Figure 1 – Sample information
Among other things, Die tries to detect the sample packer based on binary signatures. If it does match with any known ones, it is shown near the compiler and link information. If it does not, as ours did, you may try to figure it out by analyzing the file’s entropy. The higher the entropy or randomness of a binary file, higher are chances it is packed. Let’s check it out.
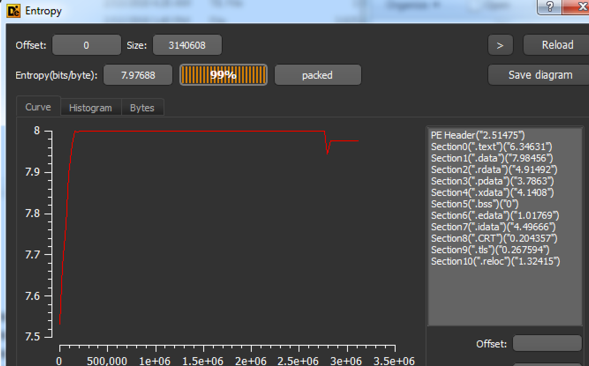
Figure 2 – Sample entropy
As you can see, the overall entropy is very high (7.97 out of 8), which indicates, with a high probability, the file is packed.
Analyzing this sample with IDA Pro, there is another great indicator of packing. As seen in Figure 3, there is a tiny block of real code (blue color) in the beginning of IDA’s overview navigator band followed by a giant blob of data (brown color) where the packed malware payload might be.
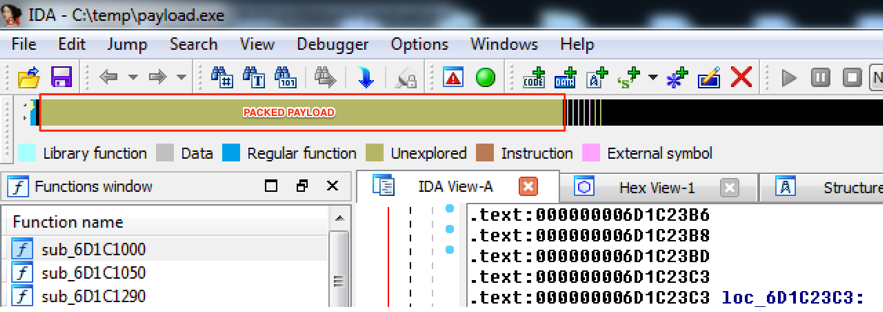
Figure 3 – Sample graphic view into IDA Pro
In situations like those, where the file is packed by an unknown packer, there is a great chance the malware developer used a self-made function to pack the payload. Let’s try to find it.
Looking for packing function
Moving the navigator overview to the beginning of the giant blob, it is possible to find its start address, as seen in Figure 4.

Figure 4 – Blob start address
Additionally, to start address (0x6D1C9020), there is an important information in this figure, which is the function that refers to it (sub_6D1C1FD9:loc_6D1C213C). In other words, there is a great chance this is the unpacking function.
Moving forward to this function, we have the assembly code shown in Figure 5.
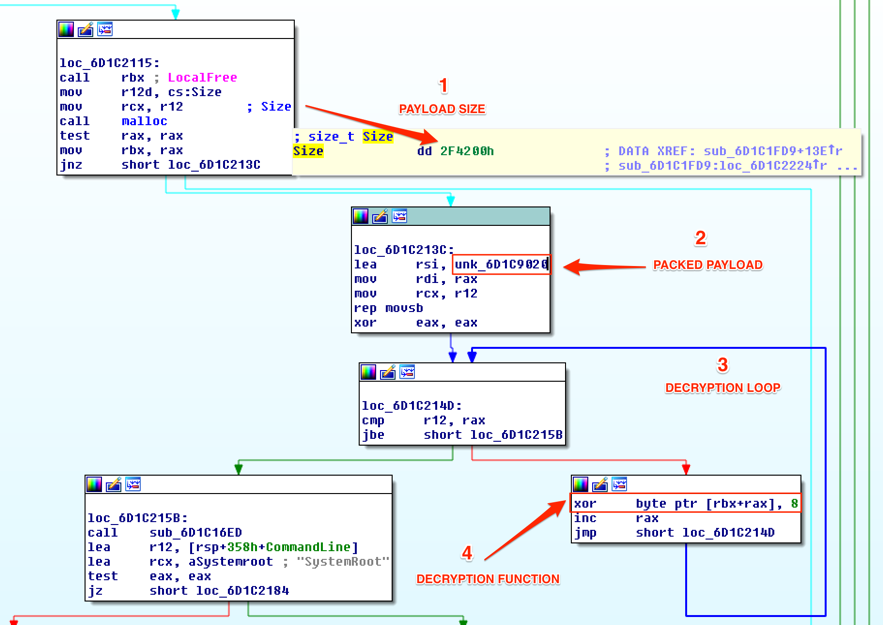
Figure 5 – Unpacking function analysis
From this we have:
- The payload size: we already knew the payload initial address (0x6D1C9020), but we didn’t know yet its size. Now we have it: 0x2F4200h;
- The blob packed address is loaded into “rsi” register;
- Decryption loop comparing r12 (blob size) with “rax” (the loop counter) while interacting with blob bytes;
- Decryption function: xor <blob byte> with 8h;
So, as seen, this is the packing function. Let’s move on.
Unpacking
Now, it’s time to try to unpack the payload using the found function. To this end, it’s necessary to extract the packed payload from the binary and implement a function to interact with its bytes while applying the ‘xor’ function.
To extract the packed payload, I used the Python script [1] shown in Figure 6. It basically receives the initial address and size of the blob and the output file.
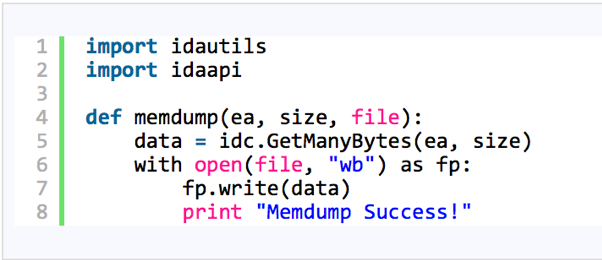
Figure 6 – Memdump IDA Pro Python script by herrcode [1]
The result of this operation will be a bunch of bytes with no meaning, as expected, as seen in Figure 7.
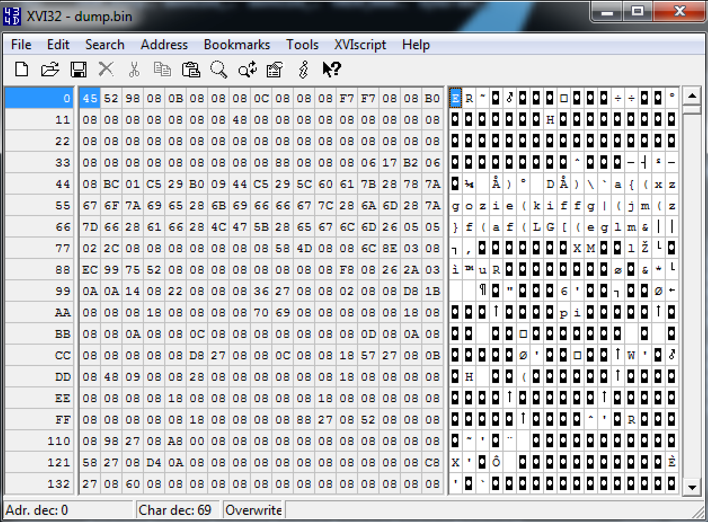
Figure 7 – Extracted packed payload
Finally, it’s time to try to decrypt this payload applying the ‘xor’ function. To this end, I implemented a simple Powershell script, as seen in Figure 8.
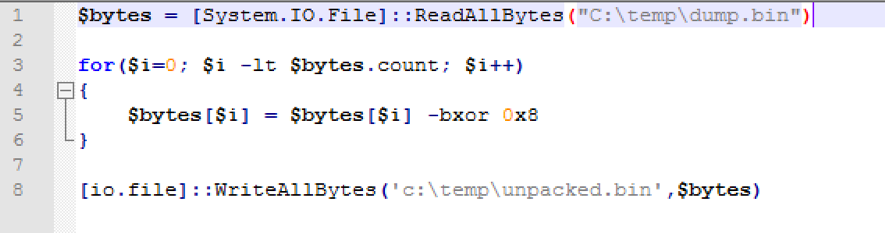
Figure 8 – Unpacking Python Script
After running this script against the packed content, I ended up with the binary code shown in Figure 9.
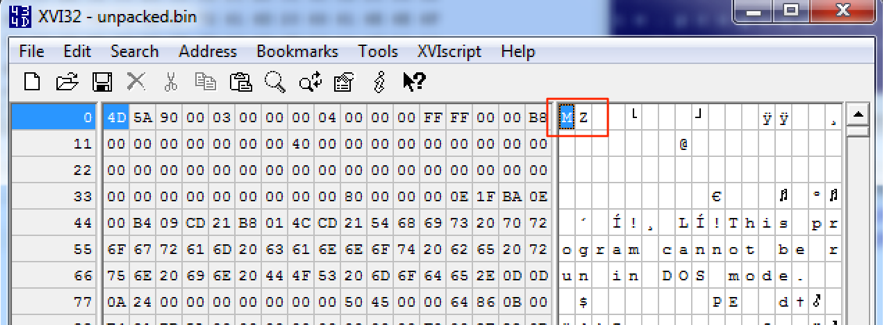
Figure 9 – Unpacked binary
As seen, the result is an executable binary file (MZ header), which means the unpacking/decrypting process run successfully.
Normally, at this point, we should have a more palatable binary, in theory, easier to be handled in a static analysis. However, in this case, the resultant binary was also packed and I had to apply the same process to open it until I had enough information on the malware intentions and IOCs.
Final notes
While writing this diary, I found a very interesting video [2] from Sergei Frankoff (@herrcode), which helped me a lot better structuring my analysis and report. Thanks for sharing with the community @herrcore.
Binary Hash
a3de2862fc7cc4aa27cccfcef2c094b7f6eebb6aab73507c1836be8c3b80fedb
References
[1] http://codegists.com/snippet/python/ida_memdumppy_herrcore_python
[2] https://www.youtube.com/watch?v=HfSQlC76_s4
-
Renato Marinho
Morphus Labs| LinkedIn| Twitter


Comments